Ingredients
– 2/3 cup (60g) black cocoa powder for deep black color and rich chocolate flavor
– 2 cups (250g) all-purpose flour for base structure and tender crumb
– 1 1/2 cups (300g) granulated sugar for sweetness and moist texture
– 1/2 teaspoon salt for enhancing flavors and balancing sweetness
– 1 teaspoon baking soda for leavening
– 1 1/2 cups (325ml) vegetable or canola oil for moisture and velvety feel
– 1 cup (235ml) buttermilk, room temperature for tenderness and tang
– 1 tablespoon white vinegar for extra lift
– 2 large eggs, room temperature for binding and richness
– 2 teaspoons vanilla extract for aromatic note
– 1 cup (220g) unsalted butter, room temperature for buttercream base
– 1 cup (210g) vegetable shortening for frosting stability and smoothness
– 2 to 3 cups (240g-360g) powdered sugar for sweetening and thickening buttercream
– 1 1/2 cups (150g) black cocoa powder for intense color and flavor in buttercream
– 1 teaspoon vanilla extract for enhancing frosting
– White food coloring for decorations
– White sprinkles for festive touch
Instructions
1-First Step: Preheat your oven to 350°F and prepare your baking pans. Spray and line three 6-inch round cake pans with parchment paper, and use cake strips if you have them to ensure even baking. This step sets the stage for a professional-looking cake without any sunken centers.
2-Second Step: In a large bowl, whisk together the dry ingredients. Combine 2/3 cup black cocoa powder, 2 cups all-purpose flour, 1 1/2 cups granulated sugar, 1/2 teaspoon salt, and 1 teaspoon baking soda until well mixed. This mixture forms the foundation of your black velvet cake, providing structure and flavor.
3-Third Step: In another bowl, whisk the wet ingredients. Mix 1 1/2 cups vegetable or canola oil, 1 cup buttermilk at room temperature, 1 tablespoon white vinegar, 2 large eggs at room temperature, and 2 teaspoons vanilla extract. For a vegan twist, you can make homemade buttermilk by mixing 1 cup whole milk minus 1 tablespoon with 1 tablespoon vinegar and letting it sit for 10 minutes.
4-Fourth Step: Gradually combine the wet ingredients into the dry mixture. Start by slowly adding the wet mix to the dry while whisking, then switch to a spatula when the batter thickens and fold until smooth. Be careful not to overmix, as this keeps the cake tender and light, adapting to preferences for a fluffier texture.
5-Fifth Step: Pour the batter evenly into the prepared pans. Divide it carefully to avoid uneven baking, then bake for 35-40 minutes or until a toothpick inserted comes out clean. For dietary needs, if making it gluten-free, substitute the flour as mentioned earlier to maintain the cake’s moist quality.
6-Sixth Step: Cool the cakes in the pans for 20 minutes, then transfer them to a rack and remove the parchment paper. Chill them uncovered in the refrigerator for 1 hour if you’re decorating the same day, or wrap and chill up to 2 days for later use. This cooling step is crucial to prevent the buttercream from melting.
7-Seventh Step: Prepare the buttercream. Cream 1 cup unsalted butter and 1 cup vegetable shortening until smooth, then add 2 to 3 cups powdered sugar one cup at a time, followed by 1 1/2 cups black cocoa powder and 1 teaspoon vanilla extract. If needed, add more sugar for thickness, and for low-calorie options, consider reducing the sugar slightly.
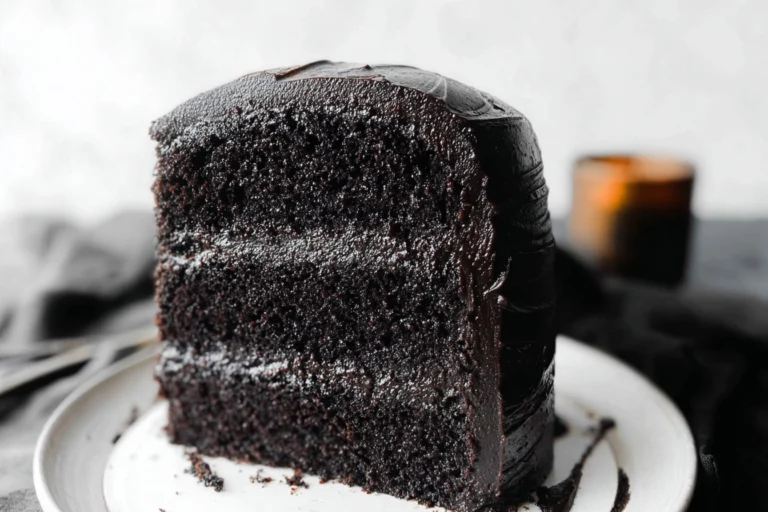
8-Eighth Step: Level the cooled cakes and assemble. Spread buttercream between the layers, chill for 20 minutes to set, then frost the entire cake with the remaining buttercream and chill again until firm. This step ensures the layers don’t slide and allows for adaptations like using less frosting for diet-conscious bakers.
9-Ninth Step: Add decorations if desired. Thin white food coloring with water and flick it onto the chilled cake using a clean paintbrush. Lightly toss white sprinkles onto the sides and attach small paper bats to fine floral wire, making small loops to insert into the cake without tipping. For ideas on other fun decorations, check out our pumpkin spice latte recipe for seasonal twists.
10-Final Step: Insert the bats on top before serving if you’re storing the cake, or right after decorating if serving immediately. Slice and serve your black velvet cake, enjoying the rich, moist delight you’ve created. This brings everything together, making it a hit for food enthusiasts and perfect for sharing with family.
Last Step:
Please leave a rating and comment letting us know how you liked this recipe! This helps our business to thrive and continue providing free, high-quality recipes for you.Notes
📏 Spoon and level all dry ingredients like flour and cocoa into measuring cups or use a scale to prevent packing, ensuring a light and moist cake without density.
❄️ Chill the cake layers before assembling to make handling easier and keep the buttercream stable, preventing sliding or melting during frosting.
🥛 If buttermilk is unavailable, make a substitute by mixing 1 cup whole milk with 1 tablespoon vinegar, letting it sit for 10 minutes; it adds essential tenderness and tang.
- Prep Time: 60 minutes
- Chilling Time: 2 hours
- Cook Time: 35-40 minutes
- Category: Dessert
- Method: Baking
- Cuisine: American
- Diet: Vegetarian
Nutrition
- Serving Size: 1 slice
- Calories: 550
- Sugar: 40 g
- Sodium: 200 mg
- Fat: 35 g
- Saturated Fat: 15 g
- Unsaturated Fat: 20 g
- Trans Fat: 0 g
- Carbohydrates: 55 g
- Fiber: 2 g
- Protein: 5 g
- Cholesterol: 80 mg