Ingredients
– 250 g shortcake biscuits for creating the crust
– 75 g unsalted butter for binding the base
– 500 g full-fat cream cheese for building the filling
– 75 g icing sugar for adding sweetness
– 300 ml double cream for making filling thick and creamy
– 2 tablespoons caramel sauce for flavoring the filling
– 100 g milk chocolate for making the ganache
– 100 ml double cream for melting the chocolate
– 4 tablespoons caramel sauce for topping layer
– As needed chocolate caramel bars for decoration
Instructions
1-First Step: Make the biscuit base Start by crushing 250 g shortcake biscuits into fine crumbs. You can do this with a food processor, or place them in a sealed bag and crush them with a rolling pin if that is easier. The finer the crumbs, the neater the crust will look when sliced. Once the biscuits are crushed, mix them with 75 g melted unsalted butter until every crumb is lightly coated. The mixture should look like damp sand and hold together when pressed. This is the base that gives the No-Bake Twix Cheesecake its buttery crunch, so take a moment to mix it well. Press the biscuit mixture firmly into an 8-inch springform pan. Use the back of a spoon, the bottom of a glass, or even your fingers to flatten it into an even layer. If you want cleaner slices later, line the base of the pan with parchment paper before adding the crumbs. Once the crust is in place, chill it for 30 minutes to 1 hour. This helps the butter set and keeps the base from crumbling when you add the filling. If you are short on time, place it in the freezer for a faster set.
2-Second Step: Mix the cheesecake filling In a large bowl, combine 500 g full-fat cream cheese with 75 g icing sugar. Beat just until smooth. The cream cheese should be at room temperature so it blends easily and does not leave lumps. This is one of the biggest secrets to a creamy No-Bake Twix Cheesecake. Next, pour in 300 ml double cream and whisk until the mixture becomes thick and smooth. The filling should hold its shape, but still look soft and silky. If you overbeat it, the texture can turn grainy. If you underbeat it, the cheesecake may stay too loose, so aim for a balanced mix. Now stir in 2 tablespoons caramel sauce or dulce de leche. This adds that sweet caramel flavor that makes the dessert taste like the candy bar version. If you like a stronger caramel note, use salted caramel sauce instead. The slight saltiness works beautifully with the cream cheese and chocolate. As you mix, scrape the sides of the bowl so everything blends evenly. A smooth filling means fewer air pockets and a better final texture after chilling.
3-Third Step: Fill and chill the cheesecake Spoon the filling over the chilled base and spread it out evenly with a spatula. Make sure the top is level so the caramel and ganache can sit neatly later. Gently tap the pan on the counter once or twice to release any air bubbles. Now place the cheesecake in the fridge and chill it for at least 6 hours. For the best slice, a full 6 to 7 hours is even better. This is where the cheesecake sets up properly, so do not rush this part. If you cut it too early, the layers can shift and the texture will be too soft. While the cake chills, you can clean up the kitchen or prep toppings. That is one reason this dessert works so well for busy schedules. Most of the work happens while the fridge does the rest.
4-Fourth Step: Add the caramel topping After the cheesecake has set, spread 4 tablespoons caramel sauce or dulce de leche over the top. Leave a 1 to 2 cm edge around the sides so the caramel does not spill over when the ganache is added. This creates a pretty layered effect and keeps the presentation tidy. If your caramel is very thick, warm it slightly so it spreads more easily. You want a smooth layer, not torn filling. A spoon or offset spatula works well here.
5-Fifth Step: Make the chocolate ganache Heat 100 ml double cream in a small saucepan until it is hot but not boiling. Pour it over 100 g milk chocolate in a heatproof bowl. Let it sit for a minute, then stir until the chocolate melts into a glossy ganache. Allow the ganache to cool for about 30 minutes before pouring it on the cheesecake. If it is too warm, it may slide too much or soften the caramel layer underneath. A slightly cooled ganache gives you better control and a cleaner finish. Pour the ganache over the caramel layer and gently spread it to the edges. You can tilt the pan slightly if needed, but avoid moving it around too much. The goal is a smooth, even chocolate top that looks rich and polished.
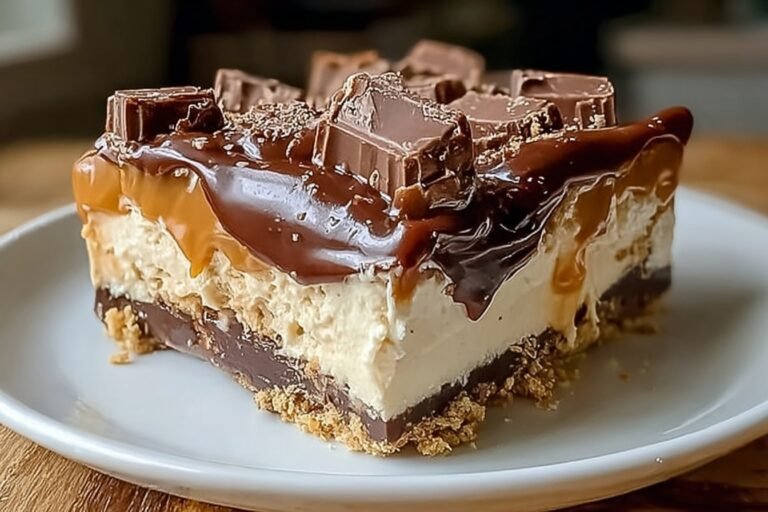
6-Final Step: Chill again and decorate Put the cheesecake back in the fridge for another 30 minutes to 3 hours. This final chill helps the ganache firm up before slicing. If you have time, a longer chill gives the best finish. Just before serving, decorate the top with whipped cream and chocolate caramel bars. You can place them in neat slices, rough chunks, or a simple scattered pattern depending on the look you want. The decoration adds texture and makes the dessert feel extra special. For a dessert spread, this cheesecake pairs nicely with lighter options like a bowl of warm porridge earlier in the day, especially if you are planning a full family meal. For gatherings, slice the cheesecake with a hot knife for the cleanest pieces.
Last Step:
Please leave a rating and comment letting us know how you liked this recipe! This helps our business to thrive and continue providing free, high-quality recipes for you.Notes
🧀 Room-temp full-fat cream cheese beats lump-free; don’t overmix filling.
⏰ Minimum 6-hour chill ensures perfect sliceable texture.
🍬 Chop Twix bars fresh; sprinkle generously right before serving for crunch.
- Prep Time: 30 minutes
- Chilling Time: 6 hours
- Category: Desserts
- Method: No Bake
- Cuisine: American
- Diet: Vegetarian
Nutrition
- Serving Size: 1 slice
- Calories: 541 kcal
- Sugar: 19 g
- Sodium: 353 mg
- Fat: 42 g
- Saturated Fat: 23 g
- Unsaturated Fat: 14 g
- Trans Fat: 1 g
- Carbohydrates: 39 g
- Fiber: 1 g
- Protein: 5 g
- Cholesterol: 110 mg