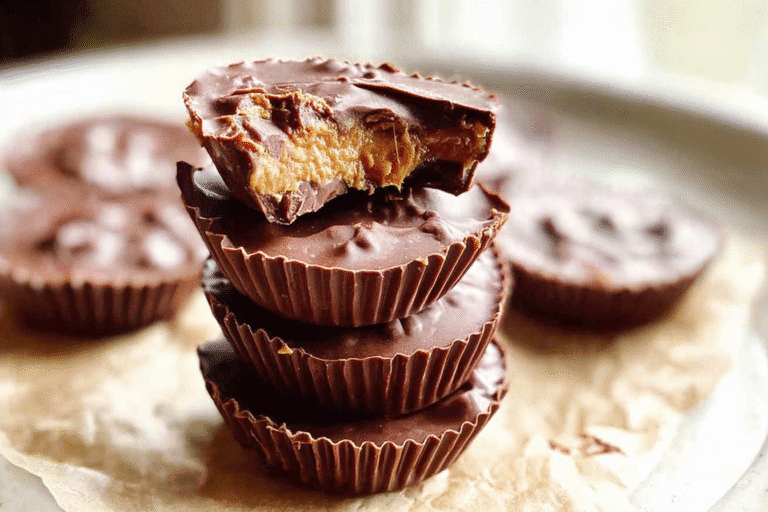
Ingredients
– ½ cup creamy peanut butter This forms the heart of the filling, providing a smooth, creamy texture and rich peanut flavor that balances the chocolate perfectly.
– 3 tablespoons room temperature butter Helps bind the peanut butter mixture, making it easier to handle and giving a silky consistency to the filling.
– ¼ cup confectioners’ sugar Sweetens the peanut butter mix without adding graininess, ensuring the filling is just the right level of sweet.
– 2 cups milk chocolate chips Melts into a glossy coating that encases the filling, delivering that classic chocolate taste we all love in peanut butter cups.
Instructions
1-First Step: Gather and Prepare Your Tools Begin by lining a standard 12-cup muffin tin with paper liners to make assembly easy and mess-free. This step ensures each peanut butter cup holds its shape nicely, and it’s a great moment to measure out your ingredients like the ½ cup creamy peanut butter and 3 tablespoons room temperature butter. For those wanting a low-calorie version, have your substitutes ready now to keep things flowing smoothly.
2-Second Step: Mix the Peanut Butter Filling In a medium bowl, combine the ½ cup creamy peanut butter, 3 tablespoons room temperature butter, and ¼ cup confectioners’ sugar. Use a hand mixer on low speed until everything blends into a smooth mixture. This part is versatile if you’re using natural peanut butter, you might chill it briefly to firm up. Stir in a pinch of salt if you like, as it enhances the flavor without overpowering the homemade peanut butter cups.
3-Third Step: Melt the Chocolate Take the 2 cups milk chocolate chips and place them in a microwave-safe bowl. Heat in 20-second increments, stirring after each one until the chocolate is fully melted and smooth. For variations, swap in semi-sweet or dark chocolate here to cater to diet-conscious individuals who prefer less sweetness. This step is crucial for that glossy finish on your peanut butter cups recipe.
4-Fourth Step: Assemble the Cups Spoon about 1 tablespoon of the melted chocolate into each muffin liner to cover the bottom evenly. Then, add 2 heaping teaspoons of the peanut butter mixture right in the center of each one. For gluten-free adaptations, double-check your chocolate source to ensure it’s safe. Top each with another tablespoon of melted chocolate to seal it all in, creating that classic look.
5-Fifth Step: Settle and Chill Tap the muffin tin gently on the counter to smooth out the tops and remove any air bubbles, helping your homemade peanut butter cups set perfectly. Place the tin in the refrigerator and let it chill for 1 hour until everything firms up. If you’re a busy parent, this is a great make-ahead option just store them for later. Once set, your simple homemade peanut butter cups recipe is ready to serve as a delightful dessert or snack for 12 servings.
Last Step:
Please leave a rating and comment letting us know how you liked this recipe! This helps our business to thrive and continue providing free, high-quality recipes for you.Notes
🍴 Substitute creamy peanut butter with crunchy peanut butter, almond butter, or cashew butter for variety.
🍫 Experiment with semi-sweet, dark, or white chocolate instead of milk chocolate.
❄️ Store finished cups in an airtight container in the refrigerator for 4-5 days or freeze for up to one month.
- Prep Time: 10 minutes
- Chilling time: 1 hour
- Category: Dessert, Snack
- Method: No-Bake, Mixing
- Cuisine: American
Nutrition
- Serving Size: 1 peanut butter cup
- Calories: 263 kcal