Ingredients
– 1/2 cup butter at room temperature (soft to the touch but not melted)
– 1/2 cup powdered (icing) sugar
– 1 teaspoon vanilla extract
– 1 cup cake flour or all-purpose flour
Instructions
1-First Step: Prepare Your Ingredients and Equipment Start by taking your butter out of the refrigerator at least one hour before you plan to bake. This crucial step allows the butter to reach the perfect consistency soft enough to leave an indentation when pressed but not melted or oily. Proper butter temperature is the foundation of successful homemade Danish butter cookies. While the butter softens, gather your equipment: a handheld or stand mixer, mixing bowls, a sifter or fine-mesh strainer, a piping bag fitted with a 1M open star tip, and baking sheets lined with silicone mats or parchment paper. Having everything ready before you begin makes the process smooth and enjoyable. For more comforting recipes perfect for any time of day, explore this delicious Johnny cakes recipe that’s equally simple to prepare.
2-Second Step: Cream Butter and Sugar to Perfection Place your softened butter in a mixing bowl along with the powdered sugar and vanilla extract. Using your handheld or stand mixer, beat these ingredients together for a full 5 to 8 minutes. This extended mixing time is essential it incorporates air into the mixture and creates that pale, fluffy consistency that gives Danish butter cookies their signature tender texture. You’ll notice the mixture transform from a dense paste to a light, whipped consistency that holds soft peaks. The color should change from a deep yellow to a pale, creamy ivory. Don’t rush this step; thorough creaming is what separates good butter cookies recipe results from great ones. If you’re new to baking, set a timer to ensure you cream long enough.
3-Third Step: Incorporate the Flour Gently Once your butter and sugar mixture is perfectly creamed, scrape down the sides of the bowl to ensure everything is evenly combined. Now it’s time to add the flour. Rather than dumping it all at once, sift in the flour in three batches, adding about 1/3 cup at a time. After each addition, gently fold the flour into the butter mixture using a spatula or the mixer on its lowest setting. Fold just until no dry flour remains visible overmixing at this stage can develop gluten and make your cookies tough instead of tender. The resulting dough should be soft, slightly sticky, and hold together when pressed.
4-Fourth Step: Prepare for Piping Transfer your dough onto a sheet of plastic wrap and shape it into a log shape. This makes it easier to load into your piping bag. Trim one end of the log at an angle to help guide the dough into the bag. Fit your piping bag with a 1M open star tip, which creates those beautiful decorative swirls that Danish cookies are famous for. Load the dough into the piping bag, being careful not to overfill. Working in smaller batches (divide the dough in half if needed) makes piping much easier and gives you more control. If the dough feels too stiff to pipe smoothly, mix in 1 tablespoon of warm milk to soften it slightly.
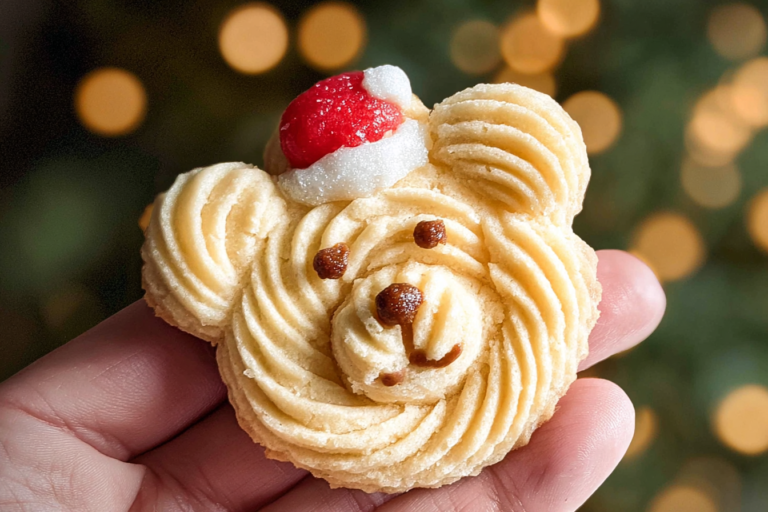
5-Fifth Step: Pipe and Chill the Cookies On your prepared baking sheets lined with silicone mats or parchment paper, pipe the dough into 1.5-inch spirals or rosette shapes. Start from the outside and work inward, applying steady, even pressure. Leave about 2 inches between each cookie to allow for slight spreading during baking. Once all cookies are piped, place the baking sheets in the refrigerator for 30 minutes. This chilling step is crucial for maintaining the beautiful shapes you’ve created. Without chilling, easy Danish butter cookies can spread too much in the oven, losing their defined edges and decorative patterns. While the cookies chill, preheat your oven to 300°F (150°C).
6-Sixth Step: Bake to Golden Perfection After the chilling time, optionally sprinkle your cookies with a little granulated sugar for added sparkle and sweetness. Place the baking sheet on the middle rack of your preheated oven and bake for about 15 minutes. You’re looking for the edges to turn a light golden color while the centers remain pale. Bake one sheet at a time for the most even results. The low temperature (300°F) allows the cookies to bake through without browning too quickly. If using a conventional oven without fan assistance, you can try 350°F (180°C) for 12-15 minutes, but watch closely to prevent overbrowning. For a detailed visual guide on achieving the perfect piping technique, check out this helpful resource on making authentic Danish butter cookies.
7-Seventh Step: Cool and Serve Remove the baking sheet from the oven and let the cookies cool directly on the sheet for 10 minutes. They’re very delicate when hot and need this time to set. After 10 minutes, carefully transfer them to a wire cooling rack to finish cooling completely. Your homemade Danish butter cookies recipe is now complete! These cookies are delicious on their own but pair wonderfully with coffee, tea, or a warm beverage of your choice. Store extras in an airtight container to maintain their crisp texture.
Last Step:
Please leave a rating and comment letting us know how you liked this recipe! This helps our business to thrive and continue providing free, high-quality recipes for you.Notes
✅ Ensure butter is room temperature but not melted for optimal creaming.
⏱️ Cream butter and sugar for a full 5-8 minutes for tender texture.
❄️ Chill piped dough for 30 minutes to enhance shape retention.
- Prep Time: 15 minutes
- Chilling: 30 minutes
- Cook Time: 13-15 minutes
- Category: Desserts
- Method: Baking
- Cuisine: Danish
- Diet: Vegetarian
Nutrition
- Serving Size: 1 cookie
- Calories: 47 kcal
- Sugar: 3-4g
- Sodium: 9mg
- Fat: 1g
- Saturated Fat: 1g
- Unsaturated Fat: 0g
- Trans Fat: 0g
- Carbohydrates: 9g
- Fiber: 0g
- Protein: 1g
- Cholesterol: 1mg